Difference between revisions of "Push button"
Jump to navigation
Jump to search
| Line 15: | Line 15: | ||
= How to control it in MicroPython = | = How to control it in MicroPython = | ||
| + | |||
| + | == Simple digital read on pin 26 with internal Pull-up | ||
| + | <syntaxhighlight lang="python" line='line'> | ||
| + | from machine import Pin | ||
| + | in26 = Pin(26, Pin.IN, Pin.PULL_UP) | ||
| + | print(in26.value()) | ||
| + | </syntaxhighlight> | ||
| + | |||
| + | == Simple digital read on pin 26 == | ||
<syntaxhighlight lang="python" line='line'> | <syntaxhighlight lang="python" line='line'> | ||
from machine import Pin | from machine import Pin | ||
| Line 20: | Line 29: | ||
print(in26.value()) | print(in26.value()) | ||
</syntaxhighlight> | </syntaxhighlight> | ||
| − | |||
= Related Tutorial Videos = | = Related Tutorial Videos = | ||
Revision as of 00:12, 30 August 2020
Contents
Description
With a button we can select which of the two sides are connected to the middle. It is similar to a switch but it only stays in the state as long as it is pressed.
How to connect it electrically
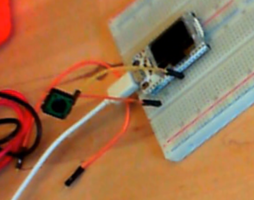
This is the most simple way of connecting a button. if the button is not pressed (open) there is no signal at the pin. Hence here we should use an internal pullup resistor.
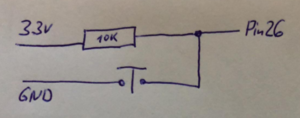
This is the connection of a button with a pullup resistor. If the button is not pressed, 3.3V are connected to the pin via the 10 KOhm resistor (reads 1). if it is pressed it is connected to GND (reads 0).
How to control it in MicroPython
== Simple digital read on pin 26 with internal Pull-up
1 from machine import Pin
2 in26 = Pin(26, Pin.IN, Pin.PULL_UP)
3 print(in26.value())
Simple digital read on pin 26
1 from machine import Pin
2 in26 = Pin(26, Pin.IN)
3 print(in26.value())
Related Tutorial Videos
Digital Input


