3D Printer/Bambu Lab P1S: Difference between revisions
Jump to navigation
Jump to search
| (10 intermediate revisions by the same user not shown) | |||
| Line 3: | Line 3: | ||
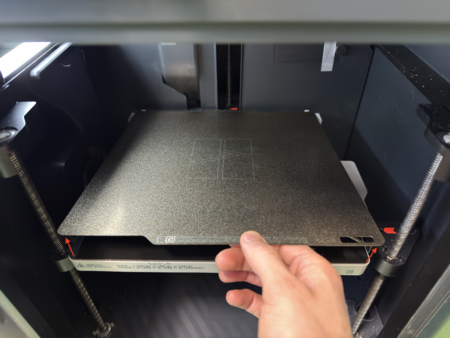
# First clean the magnetic steel sheet. To do so pull it up on the front edge and spray a few times with isopropyl alcohol on it.<br>[[File:bambu_lab_p1s_1_1.png|450px]]<br><br> | # First clean the magnetic steel sheet. To do so pull it up on the front edge and spray a few times with isopropyl alcohol on it.<br>[[File:bambu_lab_p1s_1_1.png|450px]]<br><br> | ||
# Wipe it up with a paper towel. | # Wipe it up with a paper towel. | ||
# Place back the steel sheet. Please note the orientation of the plate.<br>[[File:bambu_lab_p1s_1_4.png|450px]] | # Place back the steel sheet. Please note the orientation of the plate.<br>[[File:bambu_lab_p1s_1_4.png|450px]] | ||
== Change Filament == | == Change Filament == | ||
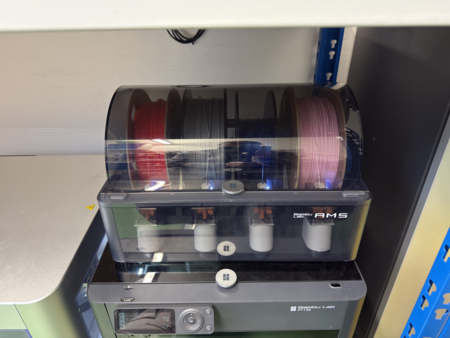
# The printer has an Automatic Material System (AMS), this allows the printer to switch between filaments.<br>[[File:bambu_lab_p1s_2_1.png|450px]]<br><br> | |||
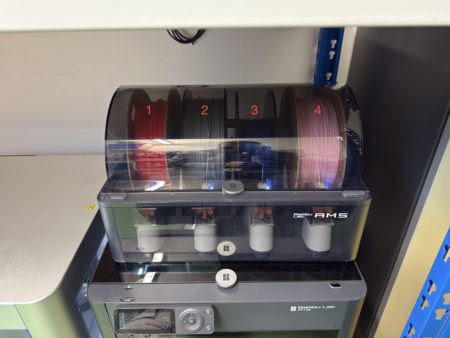
# The order of the filaments is from left to right and can be selected in the Bambu Studio app by entering the number of it (1-4).<br>[[File:bambu_lab_p1s_2_2.png|450px]]<br><br> | |||
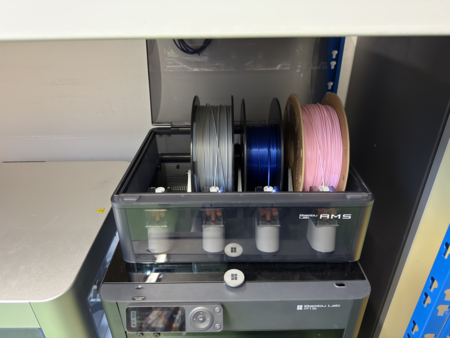
# To change a filament, first open the AMS.<br>[[File:bambu_lab_p1s_2_3.png|450px]] [[File:bambu_lab_p1s_2_4.png|450px]]<br><br> | |||
# Please do not change the filament if one of the LEDs is blinking, which means that one of filaments is stuck.<br>[[File:bambu_lab_p1s_2_5.png|450px]]<br><br> | |||
# Gently pull out one of the filaments you do not need.<br>[[File:bambu_lab_p1s_2_6.png|450px]] [[File:bambu_lab_p1s_2_7.png|450px]]<br><br> | |||
# You can find '''PLA''' filament above the printers. Please ask if you are unsure whether you can use a filament.<br>[[File:filament_1_1.png|450px]]<br><br> | |||
# <div id="PLA">Please make sure that you use '''PLA''' (type of filament)!</div>[[File:filament_1_2.png|450px]]<br><br> | |||
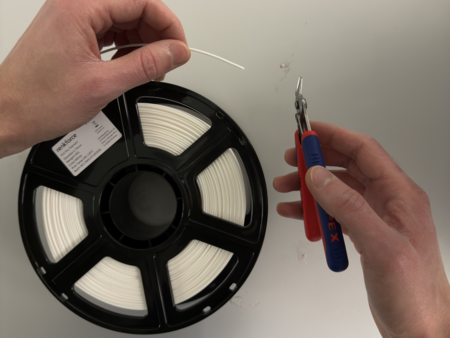
# Cut the filament straight.<br>[[File:bambu_lab_p1s_2_8.png|450px]]<br><br> | |||
# Now place the new filament in the AMS and insert it until the printer starts pulling it. | |||
# Close the AMS. | |||
== Set up Bambu Studio == | == Set up Bambu Studio == | ||
| Line 19: | Line 28: | ||
# There are different types of filament that can be used for printing. But for this printer you will always use '''Generic PLA'''. Please go through the list and make sure that '''Generic PLA''' is selected. | # There are different types of filament that can be used for printing. But for this printer you will always use '''Generic PLA'''. Please go through the list and make sure that '''Generic PLA''' is selected. | ||
# As this printer is not connected to the network unselect all settings in this step.<br>[[File:bambu_lab_p1s_3_7.png|450px]]<br><br> | # As this printer is not connected to the network unselect all settings in this step.<br>[[File:bambu_lab_p1s_3_7.png|450px]]<br><br> | ||
# After that go to the '''Prepare''' tab and select the right nozzle of the printer, which is '''Bambu Lab P1S 0.4 nozzle'''.<br>[[File:bambu_lab_p1s_3_8.png|450px]]<br><br> | |||
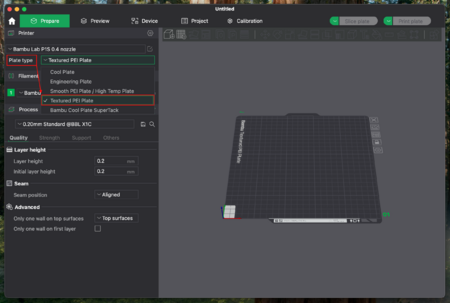
# Set the '''Plate type''' to '''Textured PEI Plate'''.<br>[[File:bambu_lab_p1s_3_9.png|450px]]<br><br> | |||
# The printer has an AMS (Automatic Material System) so 4 filaments can be used by the printer. To do so add 3 additional filaments by pressing on the cross 3 times.<br>[[File:bambu_lab_p1s_3_10.png|450px]]<br><br> | |||
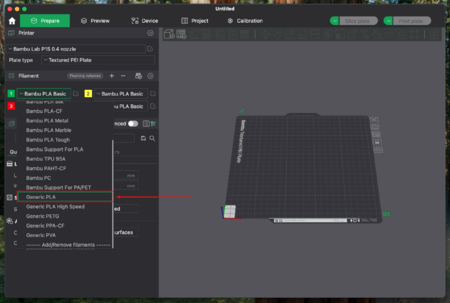
# Then change the type of filament to '''Generic PLA''' for all filaments.<br>[[File:bambu_lab_p1s_3_11.png|450px]]<br><br> | |||
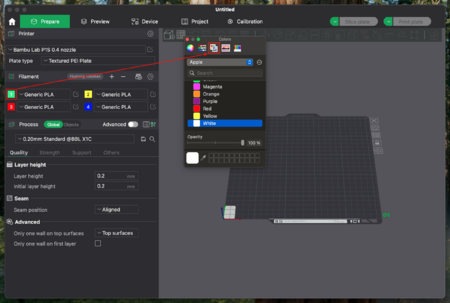
# If you want you can change the color of the filaments, but it is not necessary as it is only for distinguishing which filament you have selected for printing. To change it, just click on the number and select a color.<br>[[File:bambu_lab_p1s_3_12.png|450px]] | |||
== Your first print with Bambu Lab P1S == | |||
# Make sure you have installed the Bambu Studio application before continuing. If not please do all necessary steps in chapter [[3D_Printer/Bambu_Lab_P1S#Set_up_Bambu_Studio|Set up Bambu Studio]]. | |||
Latest revision as of 10:54, 9 January 2026
Prepare Printer
- First clean the magnetic steel sheet. To do so pull it up on the front edge and spray a few times with isopropyl alcohol on it.
- Wipe it up with a paper towel.
- Place back the steel sheet. Please note the orientation of the plate.


Change Filament
- The printer has an Automatic Material System (AMS), this allows the printer to switch between filaments.
- The order of the filaments is from left to right and can be selected in the Bambu Studio app by entering the number of it (1-4).
- To change a filament, first open the AMS.


- Please do not change the filament if one of the LEDs is blinking, which means that one of filaments is stuck.

- Gently pull out one of the filaments you do not need.

- You can find PLA filament above the printers. Please ask if you are unsure whether you can use a filament.

- Please make sure that you use PLA (type of filament)!

- Cut the filament straight.
- Now place the new filament in the AMS and insert it until the printer starts pulling it.
- Close the AMS.


Set up Bambu Studio
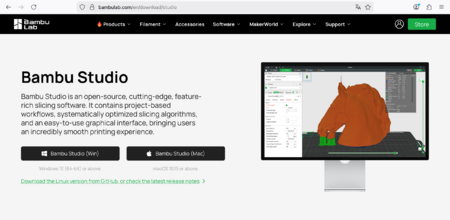
- To use the printer, you will need an application which converts the 3d model into a file that can be interpreted by the printer.
- Visit https://bambulab.com/en/download/studio and download the application for your OS.
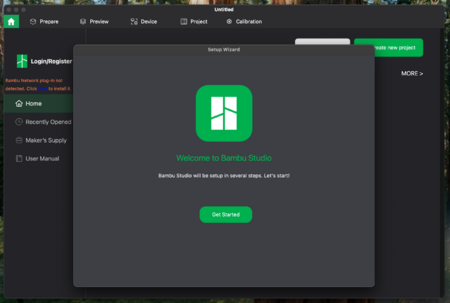
- After that open the app and follow the instructions to set it up.
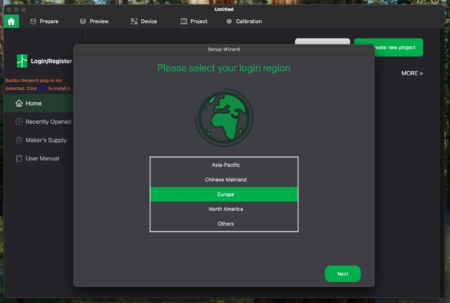
- Set your login region to Europe and click on Next.
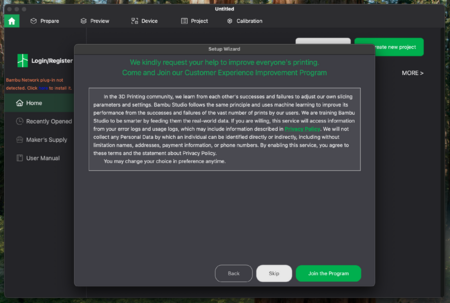
- You will be asked to join their customer experience improvement program. You can skip that.
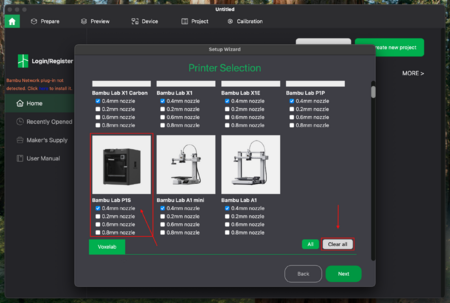
- Click on Clear all to remove all printers as you will only need the settings of the printer that is in the workshop. For that select the Bambu Lab P1S with 0.4mm nozzle and click on Next.
- There are different types of filament that can be used for printing. But for this printer you will always use Generic PLA. Please go through the list and make sure that Generic PLA is selected.
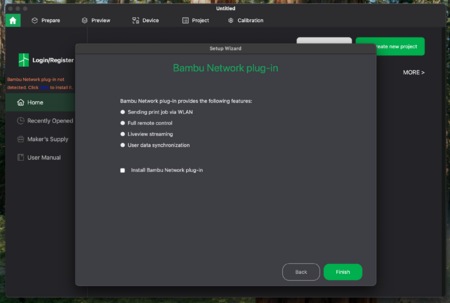
- As this printer is not connected to the network unselect all settings in this step.
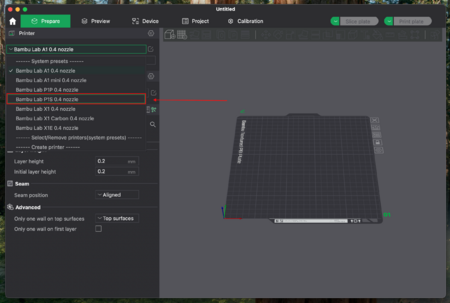
- After that go to the Prepare tab and select the right nozzle of the printer, which is Bambu Lab P1S 0.4 nozzle.
- Set the Plate type to Textured PEI Plate.
- The printer has an AMS (Automatic Material System) so 4 filaments can be used by the printer. To do so add 3 additional filaments by pressing on the cross 3 times.

- Then change the type of filament to Generic PLA for all filaments.
- If you want you can change the color of the filaments, but it is not necessary as it is only for distinguishing which filament you have selected for printing. To change it, just click on the number and select a color.


Your first print with Bambu Lab P1S
- Make sure you have installed the Bambu Studio application before continuing. If not please do all necessary steps in chapter Set up Bambu Studio.