3D Printer/Bambu Lab P1S: Difference between revisions
Jump to navigation
Jump to search
| Line 21: | Line 21: | ||
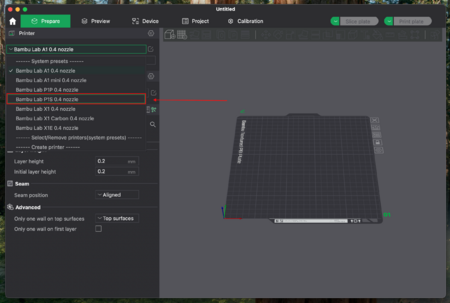
# After that go to the '''Prepare''' tab and select the right nozzle of the printer, which is '''Bambu Lab P1S 0.4 nozzle'''.<br>[[File:bambu_lab_p1s_3_8.png|450px]]<br><br> | # After that go to the '''Prepare''' tab and select the right nozzle of the printer, which is '''Bambu Lab P1S 0.4 nozzle'''.<br>[[File:bambu_lab_p1s_3_8.png|450px]]<br><br> | ||
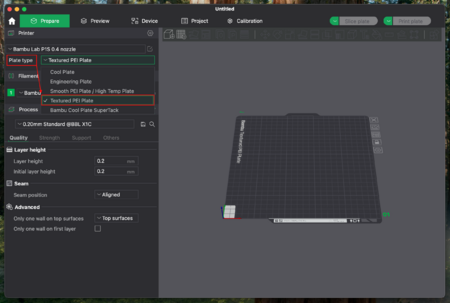
# Set the '''Plate type''' to '''Textured PEI Plate'''.<br>[[File:bambu_lab_p1s_3_9.png|450px]]<br><br> | # Set the '''Plate type''' to '''Textured PEI Plate'''.<br>[[File:bambu_lab_p1s_3_9.png|450px]]<br><br> | ||
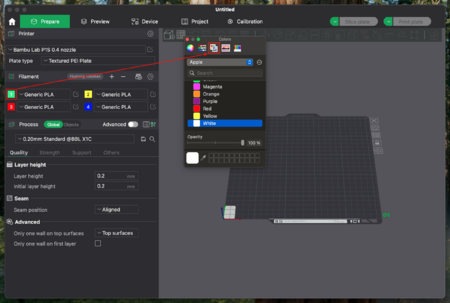
# The printer has an AMS so 4 filaments can be used by the printer. To do so add 3 additional filaments by pressing on the cross 3 times.<br>[[File:bambu_lab_p1s_3_10.png|450px]]<br><br> | # The printer has an AMS (Automatic Material System) so 4 filaments can be used by the printer. To do so add 3 additional filaments by pressing on the cross 3 times.<br>[[File:bambu_lab_p1s_3_10.png|450px]]<br><br> | ||
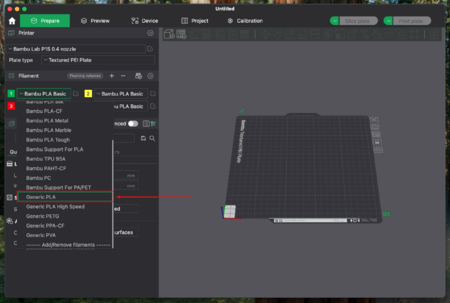
# Then change the type of filament to '''Generic PLA''' for all filaments.<br>[[File:bambu_lab_p1s_3_11.png|450px]]<br><br> | # Then change the type of filament to '''Generic PLA''' for all filaments.<br>[[File:bambu_lab_p1s_3_11.png|450px]]<br><br> | ||
# If you want you can change the color of the filaments, but it is not necessary as it is only for distinguishing which filament you have selected for printing. To change it, just click on the number and select a color.<br>[[File:bambu_lab_p1s_3_12.png|450px]] | # If you want you can change the color of the filaments, but it is not necessary as it is only for distinguishing which filament you have selected for printing. To change it, just click on the number and select a color.<br>[[File:bambu_lab_p1s_3_12.png|450px]] | ||
Revision as of 13:51, 2 December 2025
Prepare Printer
- First clean the magnetic steel sheet. To do so pull it up on the front edge and spray a few times with isopropyl alcohol on it.
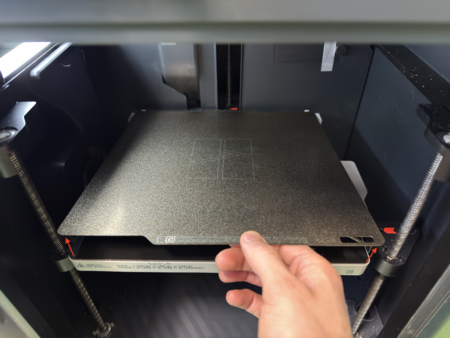
- Wipe it up with a paper towel.
- Place back the steel sheet. Please note the orientation of the plate.


Change Filament
Set up Bambu Studio
- To use the printer, you will need an application which converts the 3d model into a file that can be interpreted by the printer.
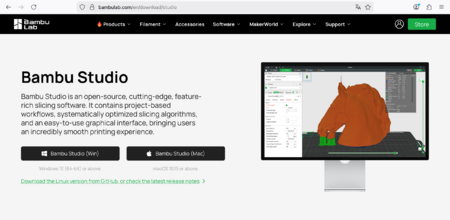
- Visit https://bambulab.com/en/download/studio and download the application for your OS.
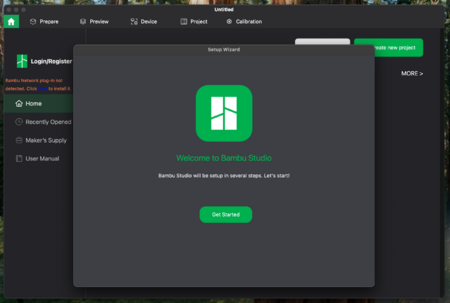
- After that open the app and follow the instructions to set it up.
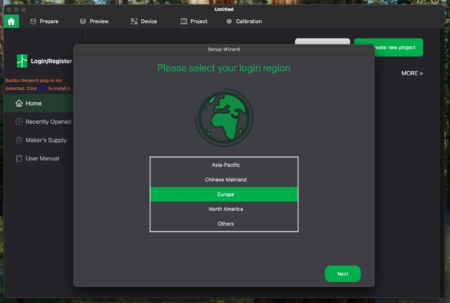
- Set your login region to Europe and click on Next.
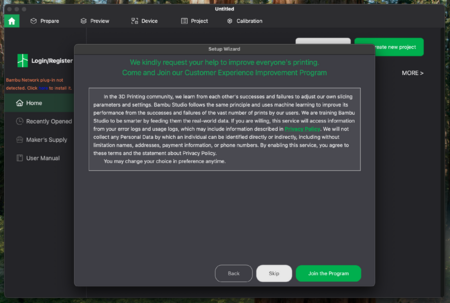
- You will be asked to join their customer experience improvement program. You can skip that.
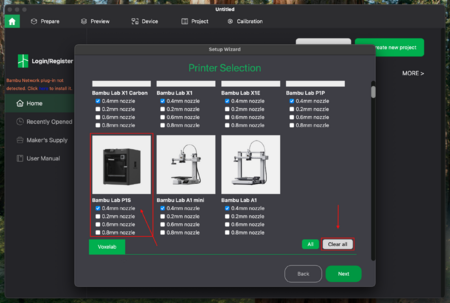
- Click on Clear all to remove all printers as you will only need the settings of the printer that is in the workshop. For that select the Bambu Lab P1S with 0.4mm nozzle and click on Next.
- There are different types of filament that can be used for printing. But for this printer you will always use Generic PLA. Please go through the list and make sure that Generic PLA is selected.
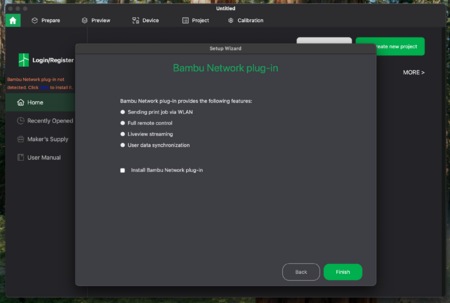
- As this printer is not connected to the network unselect all settings in this step.
- After that go to the Prepare tab and select the right nozzle of the printer, which is Bambu Lab P1S 0.4 nozzle.
- Set the Plate type to Textured PEI Plate.
- The printer has an AMS (Automatic Material System) so 4 filaments can be used by the printer. To do so add 3 additional filaments by pressing on the cross 3 times.

- Then change the type of filament to Generic PLA for all filaments.
- If you want you can change the color of the filaments, but it is not necessary as it is only for distinguishing which filament you have selected for printing. To change it, just click on the number and select a color.